Compliance with the NY Radiation Safety/Quality Assurance Program
- Home
- Compliance with the NY Radiation Safety/Quality Assurance Program
PerfectLum Suite: effortless compliance with the NY PDM guide
This detailed and guide will help you make sure your display complies with the NY PMD regulation while using PerfectLum Suite. Follow these simple steps:
STEP 1. Install PerfectLum Suite.
Pre-installation conditions:
Power on the workstation with all display(s) attached that you intend to use. Check if the screen settings are correctly configured:
XP – Go to Settings -> Control panel, and double click on the display icon. Select the “Settings” tab to view screen resolution and color settings.
Vista – Go to Settings -> Control panel and click on “Adjust screen resolution” under the Appearance and Personalisation Icon.
Windows 7 and 8 – Go to Control panel -> Display -> Adjust resolution.
Mac OS X – System Preferences -> Displays and choose resolution radio box “Best for display”.
Ensure that the screen resolution is set to the native resolution of the display with color quality of 32 bit “True color” or higher. Ensure that the correct graphics card display driver is installed. Repeat these checks for each display attached to your system. Your system is now ready to start the installation process.
IMPORTANT: Before starting the installation process, please make sure that the USB measurement device is NOT connected. The measurement device will be added later, after PerfectLum Suite is successfully installed.
IMPORTANT: If you have any other calibration software installed, please disable or uninstall it, as it can interfere with the proper operation of PerfectLum Suite.
PerfectLum Suite can be operated as a client only or as a client-server combination. Complete installation consists of several components:
- PerfectLum Suite Client is the client application that runs on each of the workstations. It provides a number of actions that can be performed locally on the workstations, including calibrating the displays, viewing test patterns or performing full QA (Quality Assurance) and acceptance tests (QA tests available only in PerfectLum Suite). Even when PerfectLum Suite Client is not connected to PerfectLum Remote Server it can still run all QA tasks on the workstation.
- PerfectLum Remote Server. All PerfectLum Suite clients can be connected to PerfectLum Remote Server. No special license is required. QA managers can connect to PerfectLum Remote Server via internet/intranet connection and take full control over the performance of connected workstations from any location at any given time.
Installation
- Windows Vista/7/8: Double click on the installer
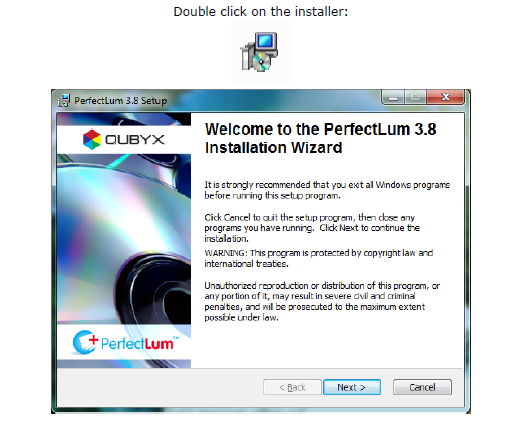
Follow the instructions presented in the installer and click on the QUBYX software license agreement after reading it carefully.
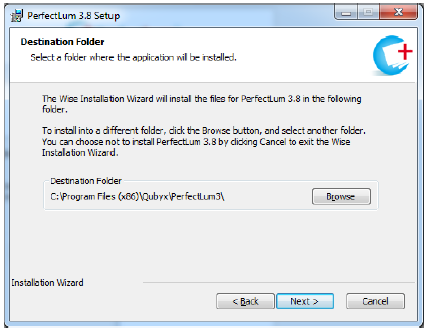
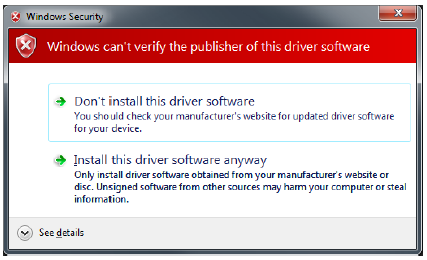
If you don’t want to install PerfectLum Suite into the default directory, browse your computer and choose another one. Windows will present a driver message for a few times during PerfectLum Suite installation. This is normal behavior as drivers to support measurement devices are loaded. Please click the „Install this driver software anyway‟ button when prompted.
- Mac OS: Double click on the installer

Proceed by double clicking on the “box”.
Follow the instructions presented in the installer and click on the QUBYX software license agreement after reading it carefully.

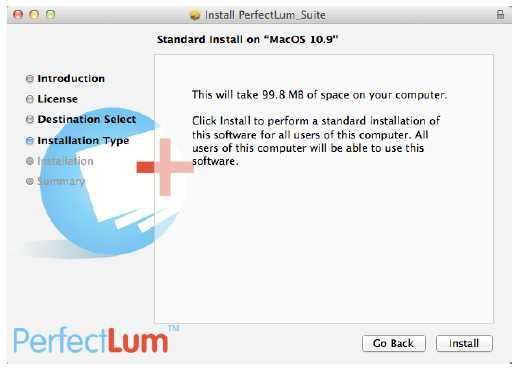
Click “Install” to begin the installation.
STEP 2. Install your Measurement Device
You will need a measurement device during the tests involving measurements (Luminance Response and Luminance Response – DICOM Curve). PerfectLum Suite is compatible with any display and the following measurement devices:
Display Front Sensor
- LumiMED MM03A
- LumiMED MM05A
- Olorin VC19012
- Olorin MC20012
- Olorin VC21012
- Sony LMD DM20
- Sony LMD DM30
- Sony LMD DM50
- Sony LMD DM20C
- Sony LMD DM30C
- Sony LMD DM50C
- Totoku CCL254i2
- Totoku CCL256i2
- Totoku CCL258i2
Colorimeter
- X-Rite Eye-One display
- X-Rite Eye-One display 2
- X-Rite Eye-One display Pro
- X-Rite Monaco OPTIX XR
- X-Rite DTP 94
- X-Rite Sequel Gamma 3
- X-Rite Sequel Chroma 4
- X-Rite Sequel Chroma 5
- Datacolor Spyder3
- Datacolor Spyder4
- Konica Minolta CS200
- Konica Minolta CA210
Spectral photometer
- X-Rite Eye-One Pro
- X-Rite Eye-One Monitor
- PhotoResearch PR 670
- IBA dosimetry / Wellhoefer LX Chroma
- JETI specbos 1001
- JETI specbos 2001
- JETI specbos 2101
- JETI specbos 4001
Spot Luminance meter
- IBA dosimetry / Wellhoefer LX Plus
- IBA dosimetry / Wellhoefer LX Can
- Pehamed CD mon
- Pehamed CD LUX
- Pehamed CD Lux plus
In order to install it:
Plug the device into an unused USB port and refer to the following depending on which OS you have installed the software:
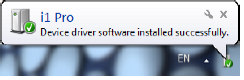
Vista and Windows 7 Vista and Windows 7 will automatically install your device driver. Wait until you receive the “Device driver software installed successfully‟ message, and jump ahead to the end of this section.
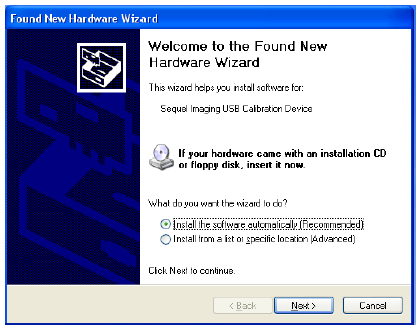
Windows XP: The “Found new Hardware Wizard” will start. Click the “Yes, this time only” radio button followed by “Next”.
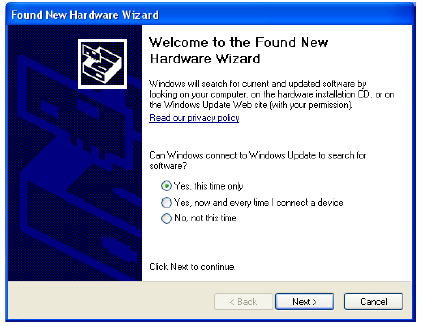
Check the “Install the Software Automatically (Recommended)” radio button and click “Next”.
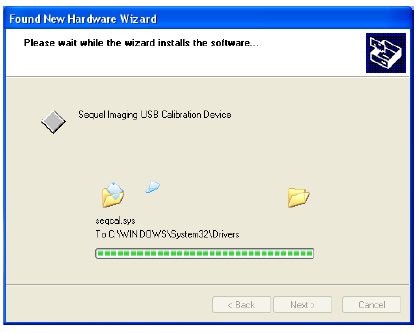
The software is installed automatically.
When all drivers have been loaded and configured, the wizard will prompt you to click on the “Finish” button.
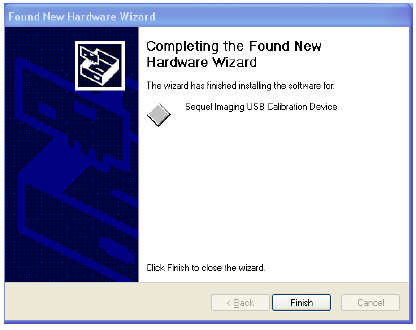
Windows will notify you when the measurement device is ready to use, by momentarily displaying the “Found New Hardware” message balloon in the lower right corner of the screen.
STEP 3. Activate your license
To activate the Calibration and QA license, click the “License” option in the main window, and select “Registration/Activation”. When the Registration/Activation window opens, enter the serial number you obtained when you purchased a license (see your invoice), and choose an activation type.
For automatic online activation, just enter and repeat your e-mail address, and click the “Activate” button.
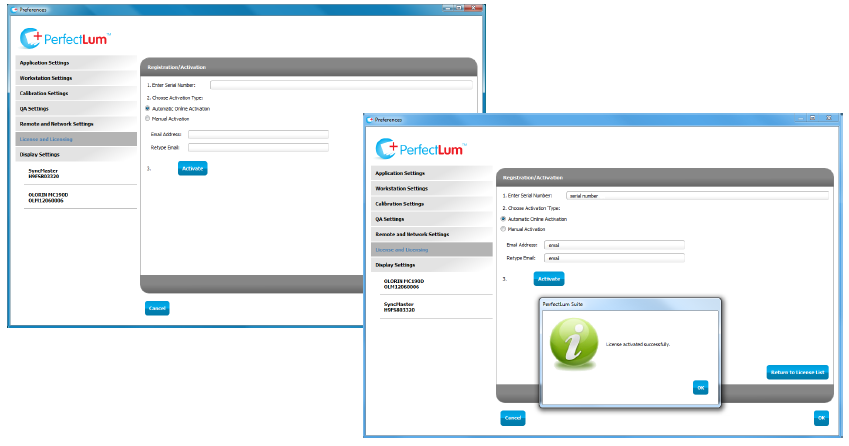
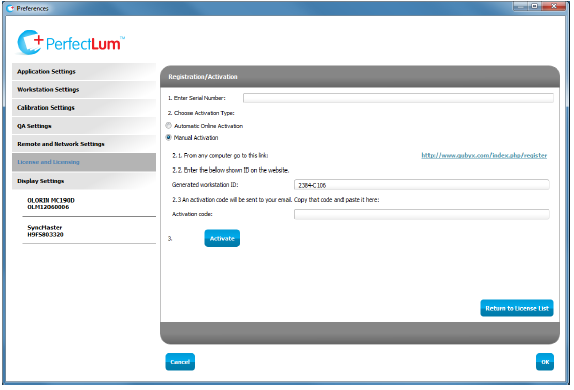
For manual activation, follow the link and fill out the form that you will find on the website. Enter the generated workstation ID that you see below into the corresponding field of the form. When you submit the form, an activation code will be sent to your e-mail. Enter this code into the field below and click “Activate”.
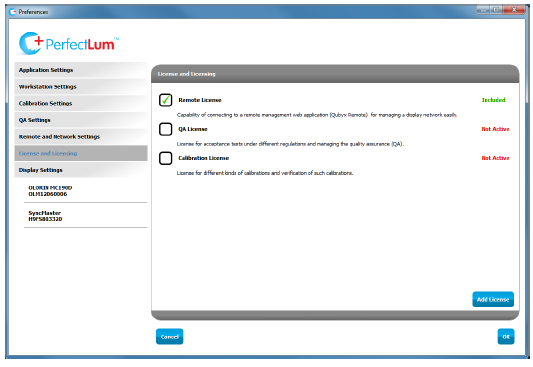
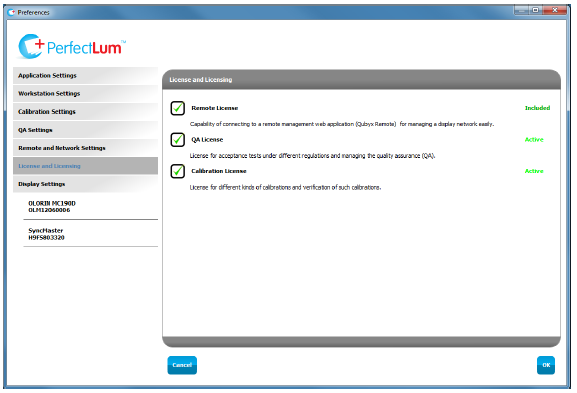
When you finish the license activation, all licenses in the Preferences > License and Licensing section will be marked as active.
STEP 4. Set up PerfectLum for NY PDM
This can be done by selecting the corresponding quality assurance settings.
Go to PerfectLum Suite Settings > Preferences and do the following:
In the “Calibration Settings” menu enter the values in accordance with the NY PDM requirements:
- select “DICOM” in the”Calibration type” drop-down menu.
- if you use the display for mammography, set the “White level” to at least 260 cd/m2. For other purposes, set the “White level” to at least 180 cd/m2.
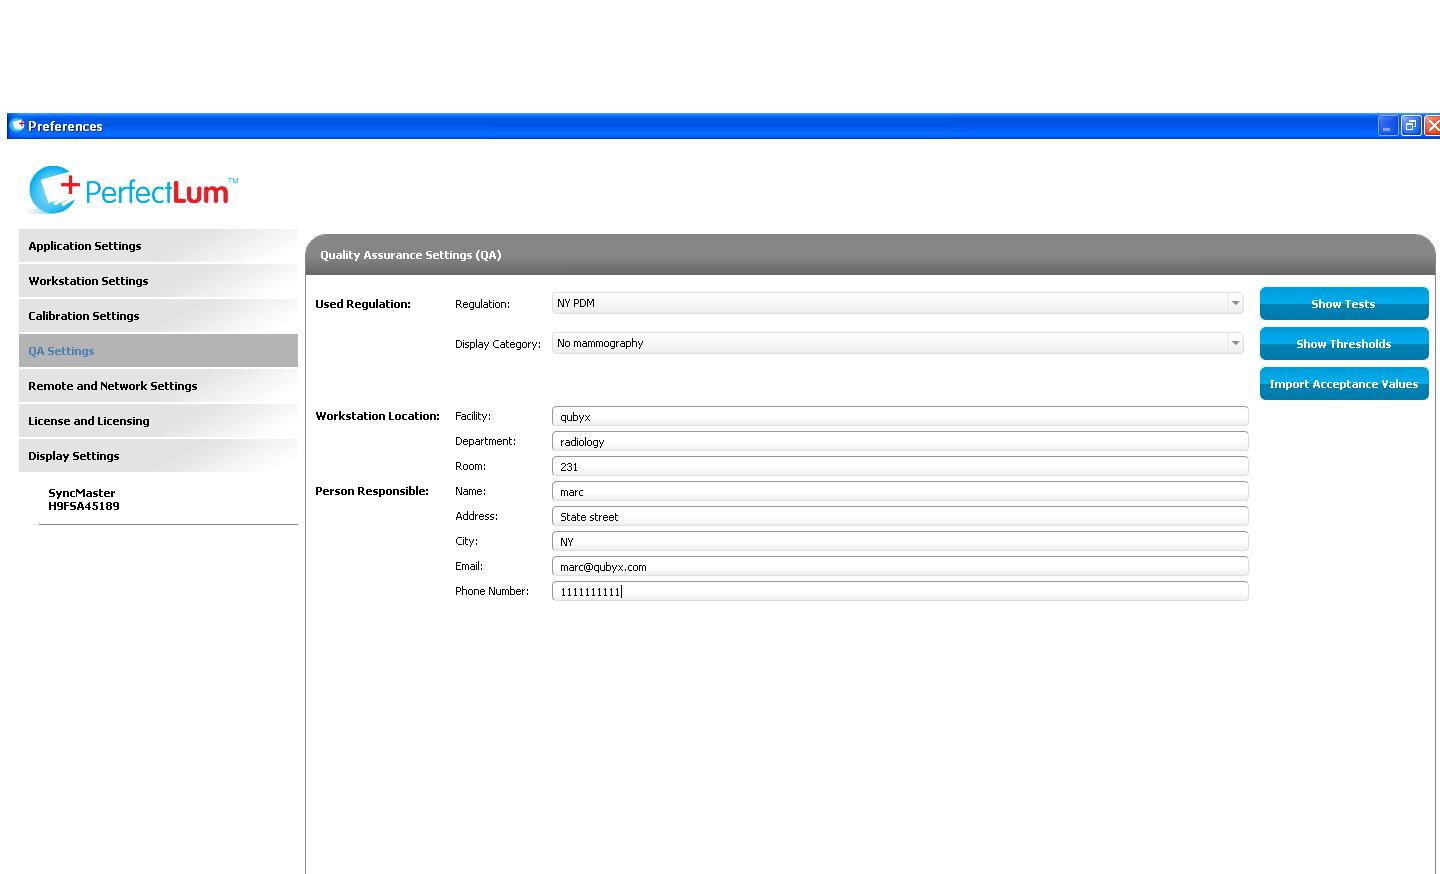
In the “QA Settings” menu:
- select “NY PDM” in the “Regulation” drop-down menu.
- the Display category is set by default to “Mammography”, so if your display is not used for mammography, choose the option “No mammography” from the drop-down menu.
- fill in the “Workstation Location” and the “Person Responsible” fields. Please note that this information will be displayed in the reports.
In the “Display Settings” menu:
- if your display has an internal LUT (Look-up Table), select “DDC/CI” in the “Calibration Upload” drop-down menu.
- check the information filled in by the software, correct if necessary and fill in the remaining fields depending on your display type.
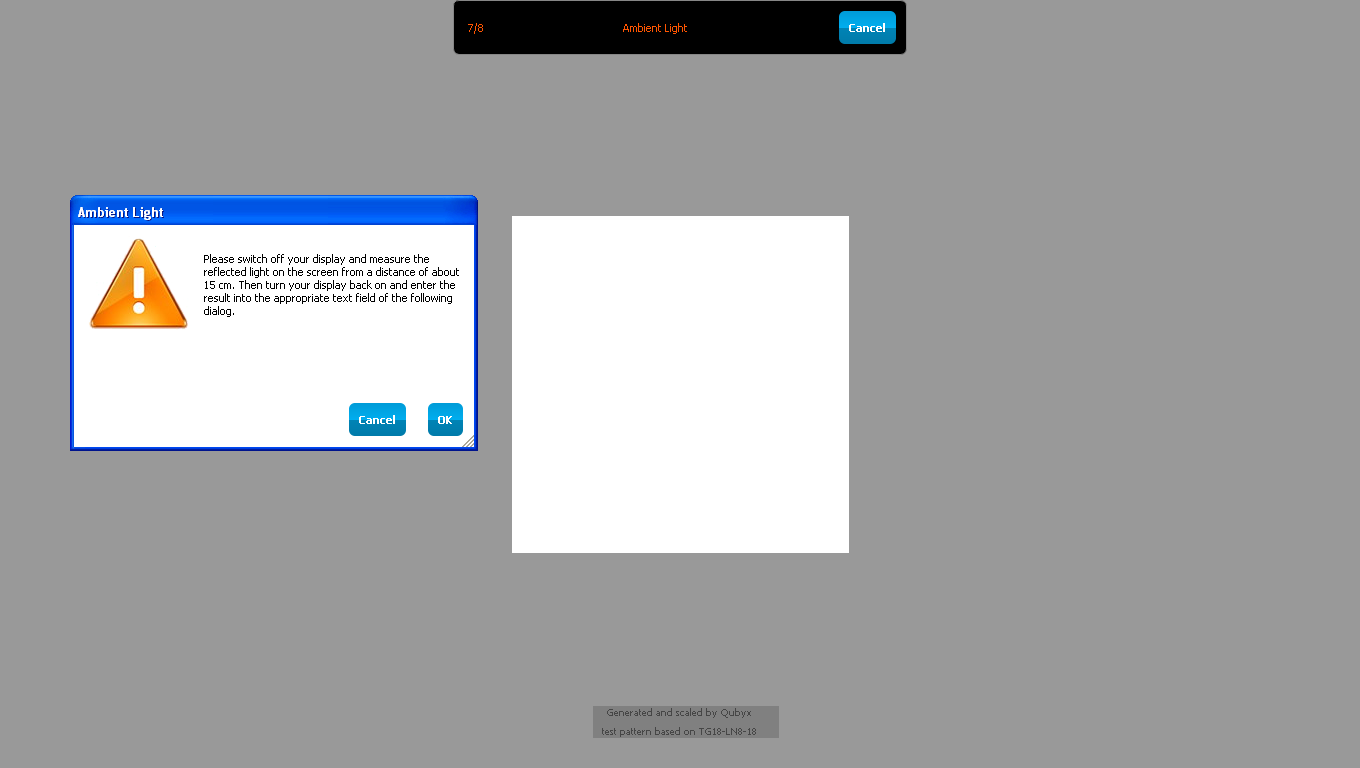
STEP 5. Measure ambient light
Go to PerfectLum Suite Settings > Preferences > Calibration Settings and click the “Measure Ambient Light” button. During this measurement the display needs to be switched off, as we need to measure the reflection of the ambient light on the display panel. This way the veiling glare is measured, which is the brightness reflected by the display surface. During the measurement process the software will switch off the backlight of the panel. You must place the sensor 15 cm away from the display facing the switched off panel.
During the measurement process don’t move the mouse and don’t hit any keys as it will switch the display back on. Once the measurement is finished the display will be automatically switched back on.
Now you are ready to perform your first calibration.
IMPORTANT: the ambient light measurement must be taken in the same lighting conditions as during the normal display operation and the subsequent calibration and acceptance tests; otherwise the display can fail the acceptance test.
STEP 6. Calibrate your display
First select the display you want to calibrate from the menu on the left. After that, click the “Calibration” button.
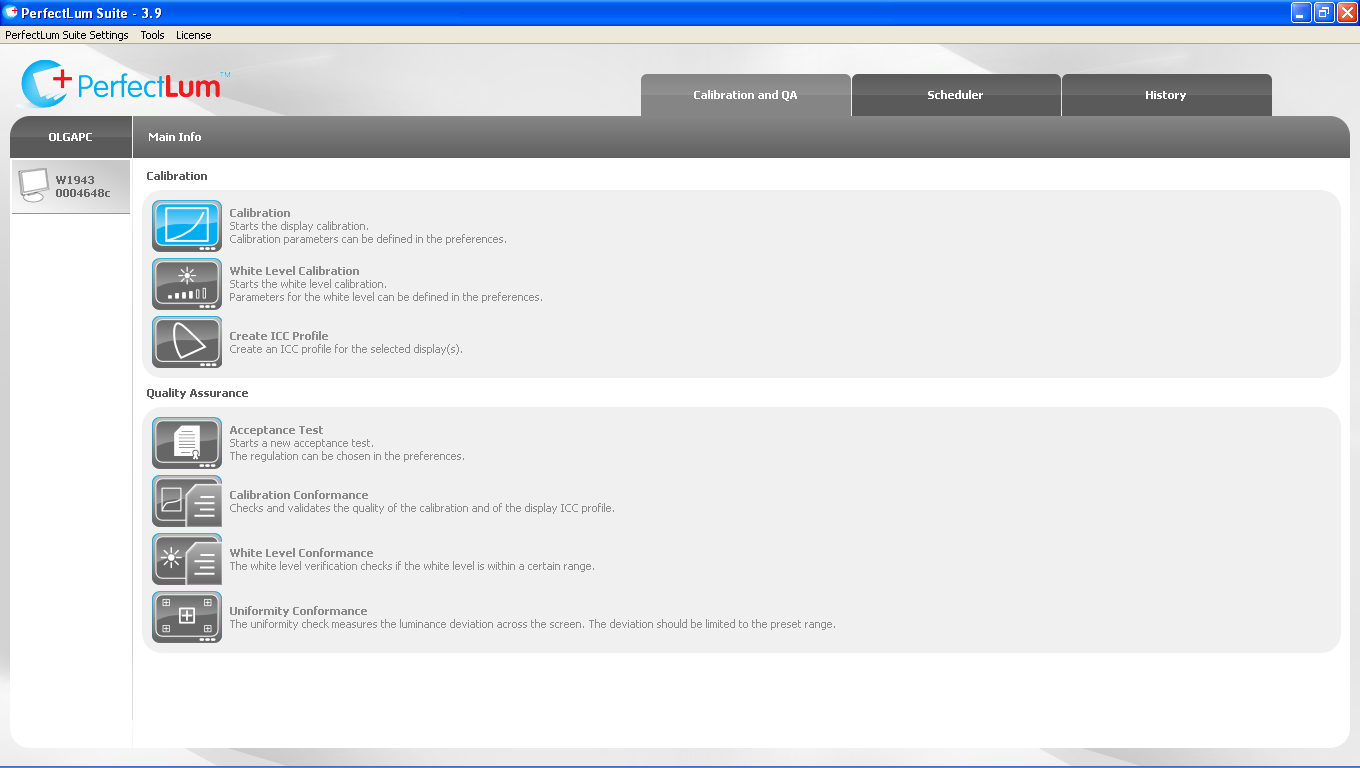
IMPORTANT: Calibration should always be started on a warmed-up display. Warm-up time is specified by the display manufacturer (minimum 30 minutes).
Place the sensor on the display and start the calibration process. Make sure no ambient light reaches the sensor. After calibration is finished a report will pop up on the screen with the calibration results.
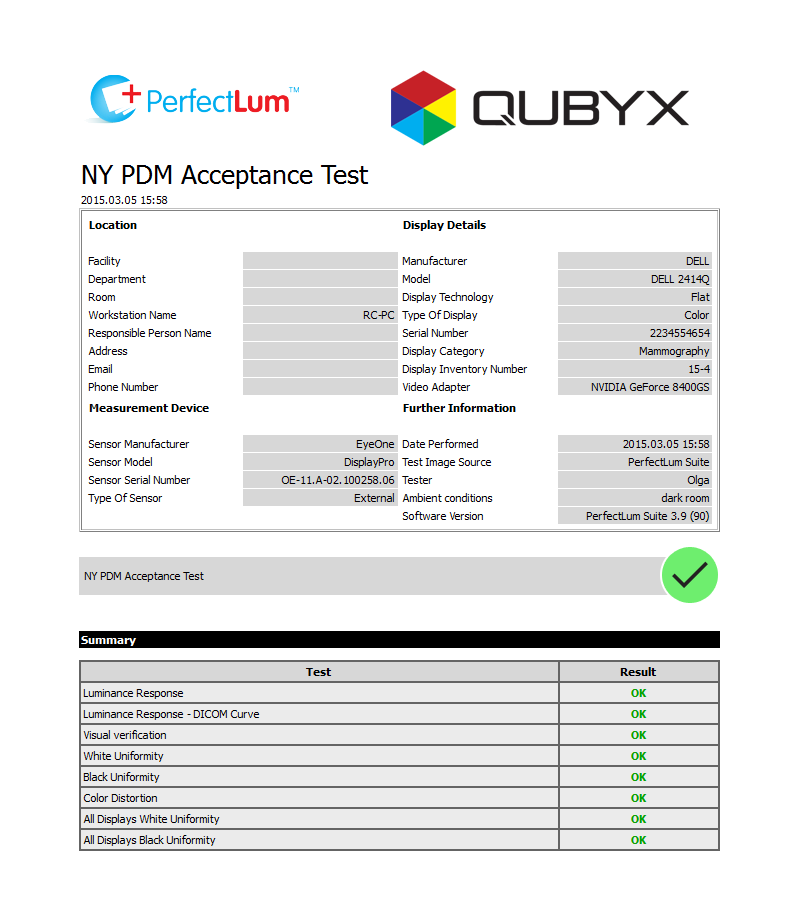
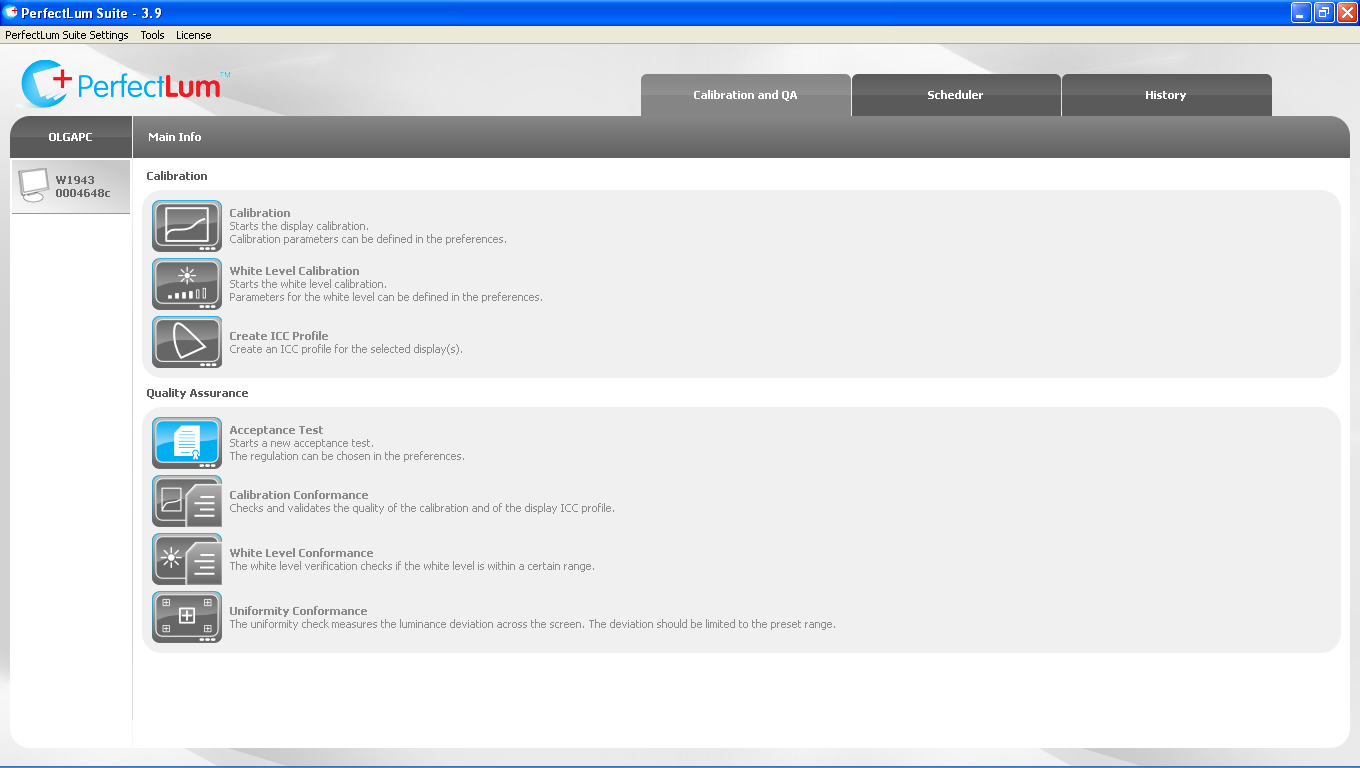
STEP 7. Perform an Acceptance test
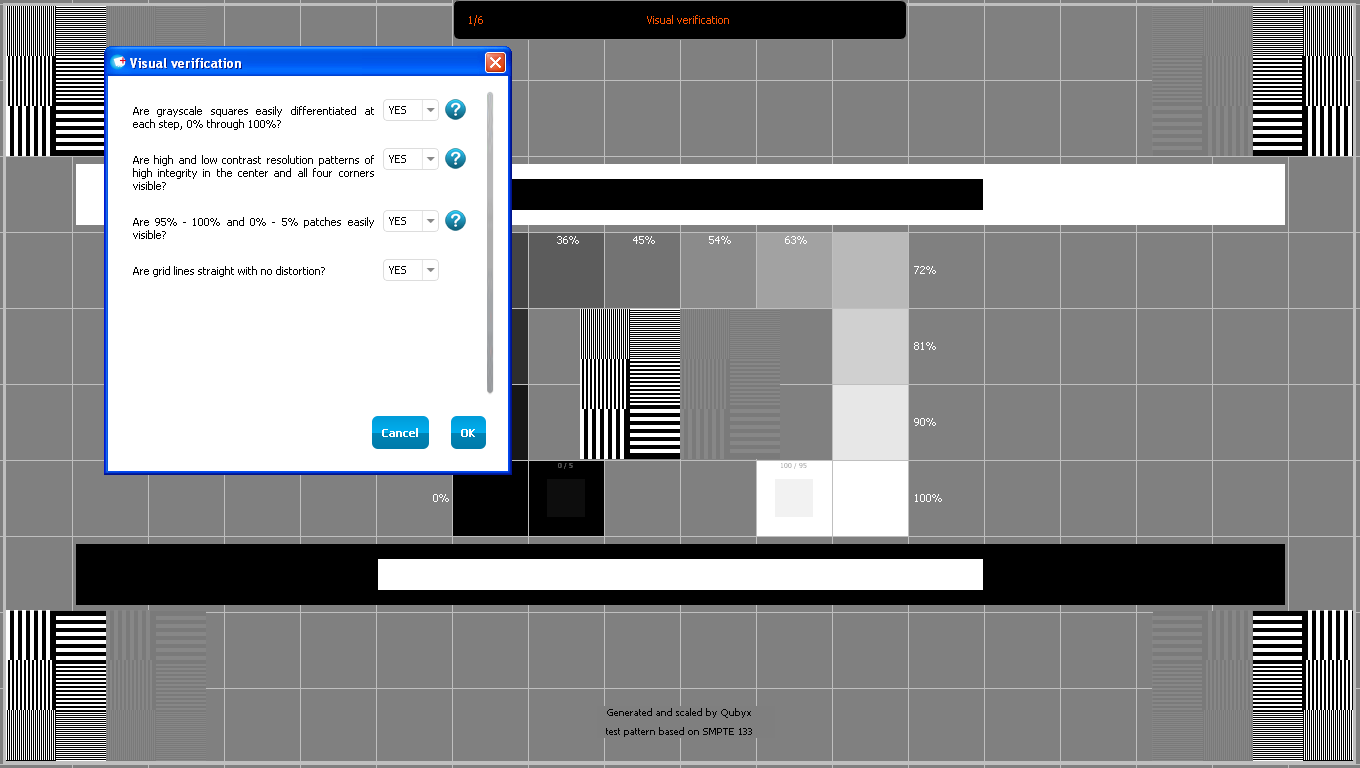
The acceptance test for NY PDM consists of two parts: a measurement part (DICOM GSDF verification test and Luminance Response test) and a set of visual tests (Visual verification test, White Uniformity test, Black Uniformity test, Color distortion test, All displays White Uniformity test, All displays Black Uniformity test).
For measurement tests an on-screen or a handheld measurement device must be used.
To start the “Acceptance test” click “Acceptance Test” in the PerfectLum main window.
You will be asked to fill in the tester’s name and the ambient conditions (here you’ll need to describe the ambient conditions of the workstation).
Answer the questions prompted by the Wizard to evaluate the display performance visually.
When the measurement part starts, follow the on-screen instructions.
Please note that during the ambient light measurement the display needs to be switched off manually, as we need to measure the reflection of the ambient light on the display panel. You must place the sensor 15 cm away from the display facing the switched off panel.
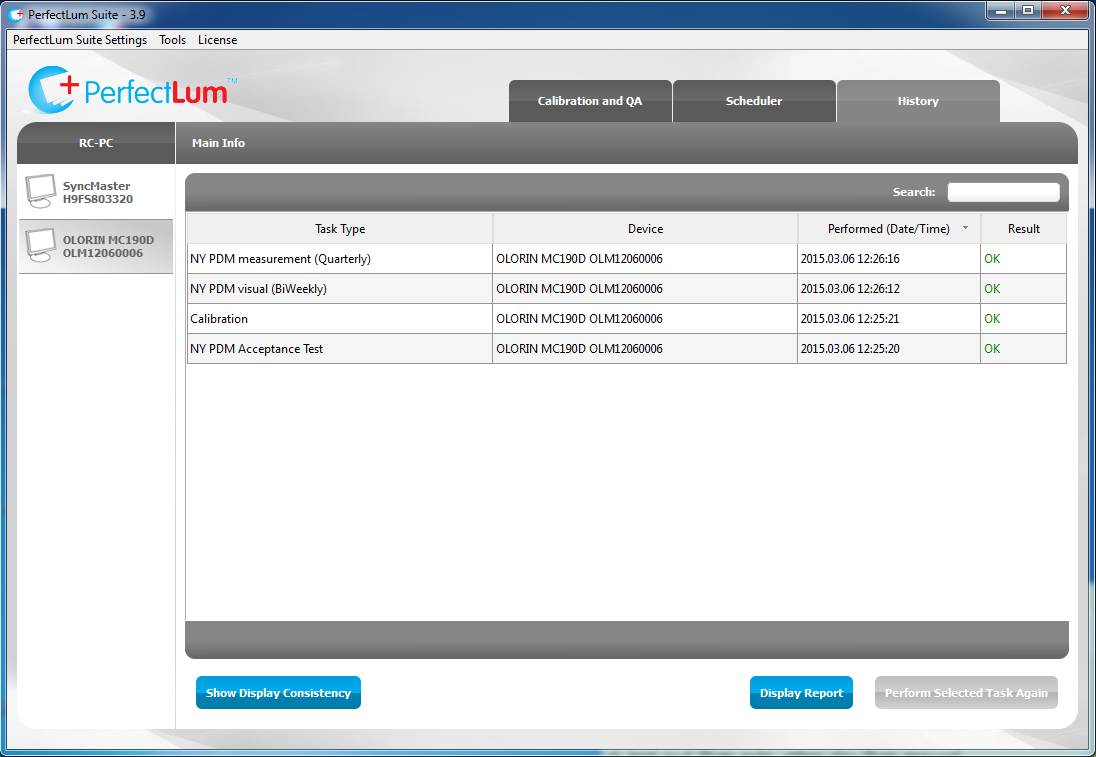
After the acceptance test was performed, associated Constancy QA Tasks (tests) are automatically scheduled. You can now see them in the “Scheduler” tab.
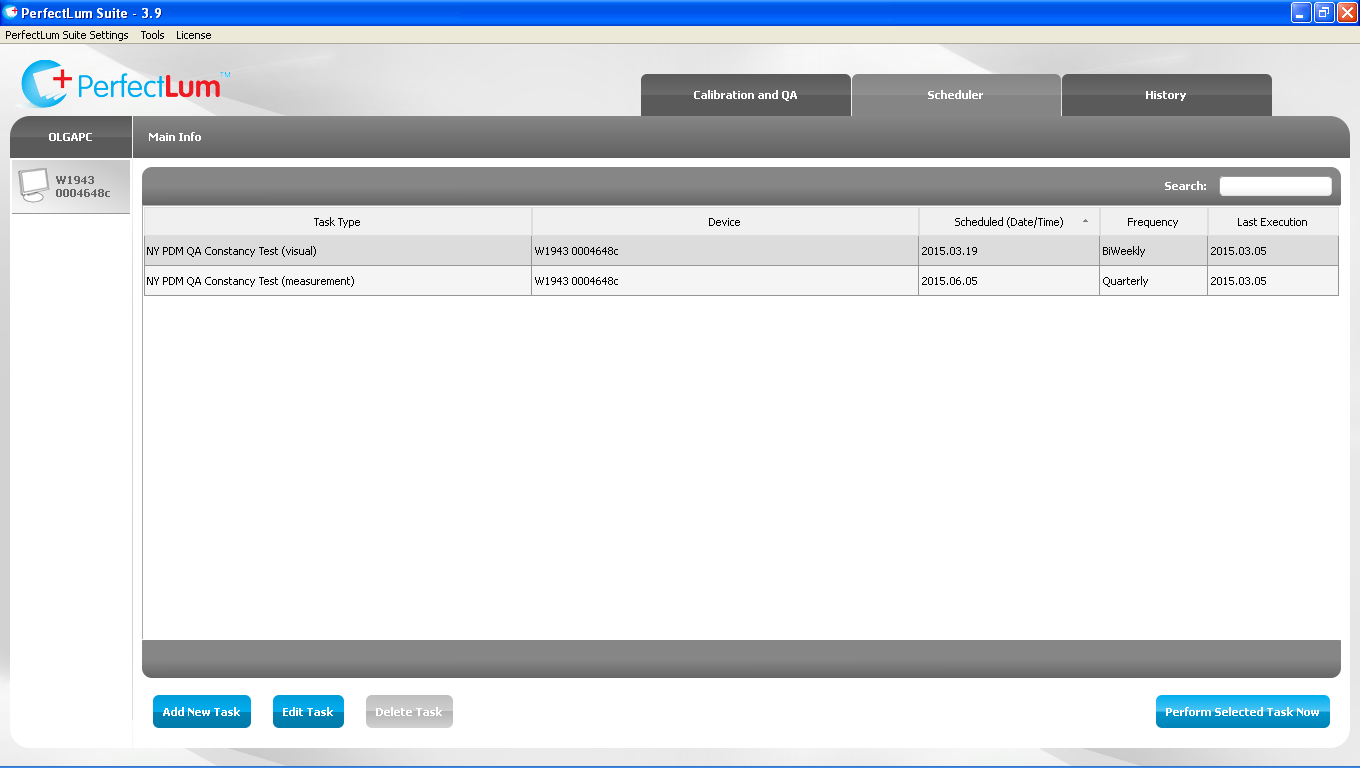
PerfectLum QA Constancy Test (visual, performed bi-weekly) includes the following tests required by the NY PDM standard:
- SMPTE test pattern evaluation
- An all-white image evaluation
- An all-black image evaluation
- Color trueness evaluation
PerfectLum QA Constancy Test (measurement, performed quarterly) includes the following test required by the NY PDM standard:
5. DICOM GSDF verification
STEP 8. Perform Constancy tests when they are due
PerfectLum calculates the dates when constancy tests are due and will remind you to perform them, even if PerfectLum is not running on the date. So when you see PerfectLum Suite Task Notification window, click the “Perform Scheduled Tasks” button and follow the on-screen instructions to evaluate the display performance.
STEP 9. Assign each test to the person responsible
According to the standard, each test must be assigned to an individual or a group of employees who will be responsible for it. For your convenience we have summarized the tests and their frequencies in the following table:
| Name of the test | Person/people Responsible | Frequency | How to perform | |
|---|---|---|---|---|
|
1 |
Acceptance Test including: – Visual verification test – White Uniformity test – Black Uniformity test – Color distortion test – All displays White Uniformity test – All displays Black Uniformity test – DICOM GSDF verification test – Luminance Response test |
|
once,
when PerfectLum is installed
|
|
|
2 |
Constancy Test (visual) including: – Visual verification test – White Uniformity test – Black Uniformity test – Color distortion test – All displays White Uniformity test – All displays Black Uniformity test |
|
Bi-Weekly
|
see step 8
|
|
3 |
Constancy Test including: – DICOM GSDF verification test – Luminance Response test |
|
Quarterly |
see step 8 |
STEP 10. Get ready for the annual evaluation
If you use PerfectLum and run Constancy tests (visual and measurement) on time, you will be ready for an annual evaluation by a Licensed Medical Physicist. The evaluation will include:
- DICOM GSDF verification
- Review of all facility QC documentation and procedures for PDMs.
- Quantitative assessment of the brightness (luminance) uniformity of each PDM
- Quantitative determination of the luminance ratio.
- Quantitative assessment of the viewing conditions.
- Analysis of all test results, including comparison with specifications provided by the vendor and applicable technical standards from professional societies
- Document recommendations for quality improvement and corrective actions.
The reports generated by PerfectLum after each operation can be submitted as QC documentation. In order to access the reports, open the “History” tab and double-click on the necessary task. The detailed report will open as a .pdf file; you can print it or save it for future use.
ADDITIONAL INFORMATION
Acceptability limits of the tests
- SMPTE test pattern evaluation (in PerfectLum: Visual Verification)
- Grayscale squares should be easily differentiated at each step, 0% through 100%.
- High and low contrast resolution patterns should be of high integrity in the center and all four corners.
- 95% – 100% and 0% – 5% patches should be easily visible.
- Grid lines should be straight with no distortion.
- An all-white image evaluation (in PerfectLum: White Uniformity and All displays White Uniformity)
On visual inspection, brightness should appear uniform on each PDM. If two or more PDMs are grouped to form a PDM workstation, there should be no noticeable difference in brightness between individual PDMs in the workstation.
- An all-black image evaluation (in PerfectLum: Black Uniformity and All displays Black Uniformity)
On visual inspection, the black should appear uniform on each PDM, and each PDM should have the same color tone. If two or more PDMs are grouped to form a PDM workstation, there should be no noticeable difference in brightness between individual PDMs in the workstation.
- Color trueness evaluation (in PerfectLum: Color distortion), only for PDMs capable of displaying color
The test pattern should contain objects of three colors, displaying shades of red, green, and blue. Objects should not be distorted.
Quarterly tests:
5. DICOM GSDF verification (in PerfectLum: Luminance Response and Luminance Response – DICOM curve).
For PDMs not used for mammography, the maximum luminance output of each PDM must be no less than 171 cd/m2, with a luminance ratio (defined as the ratio of maximum luminance to minimum luminance) no less than 170. Maximum luminance of at least 200 cd/m2 and a luminance ratio of 250 or greater are recommended.
For PDMs used for mammography, the maximum luminance output of each PDM must be no less than 250 cd/m2 , with a luminance ratio no less than 250. Maximum luminance of 450 cd/m2 and a luminance ratio of 500 or greater are recommended.
Equipment used for testing
You will only need a measurement device (puck). To check compatibility, please see step 2.
Sample records to be used for each test